Showing posts with label freehand. Show all posts

Sunday, July 8, 2012

Tried out my fimo!

Hi! I have been trying to upload everything from my to post album so here, another nail of the past! It's the first time I tried out my fimo here. 


I used Caress Blue Marine, a gray color with blue undertones. I really like this color! It's not the usual gray shade. Application was great, 2-3 coats is enough. Caress nail polishes are cheap, only 22.75php per bottle. They have a wide variety of colors. I used a dark blue Sassy Polish to create the stripes. Sassy sells nail polish that comes off with a striper brush. I think they cost 22.75php. Both Caress and Sassy nail polishes are available at Watsons and SM Department Stores.


 My thoughts on fimo? They're cute little things! Adds an instant cuteness and art to your nails. The best part of it is they are easy to work with: topcoat is enough to make it stick. How long does it stay on your nail? Well, depends on the kind of work you're doing. It does not come off easily on me, stays on my nail for a week.


What do you think about fimos?
Have a good day!

Wednesday, October 26, 2011

Hearts ala Nailside

Nailside's one of the few blogs I always check for new designs. She's famous for her awesome tape manis. I really love her designs. They're simple yet really catchy. I admire the pictures of her manis too. Her finished work always look clean and nice. Just too perfect! :))

I was really into her cartoon hearts. They're so cute. She has a tutorial on cartoon hearts here. And so I made my own version.


Pardon the tip wear on my thumb! I used the same technique in creating the dots. I love how it turned out!
Thank you so much Jane for sharing your cartoon hearts tutorial! :)

Thursday, October 20, 2011

An attempt on acrylic paint


Hello! This is a continuation of my previous post. I'll be showing you the lovely brushes I purchased from Fab Ur Nails Shop and the acrylic paint I bought from the mall. 

These are my brushes! They're tinier than I expected. They're also in pink, so girly! Just great :) This is a 12pc set which I bought for only 300 pesos (including shipping fee). I think this is a great buy. Other sellers sell the same thing for a more expensive price (12 pcs 380 pesos, shipping fee not yet included). The seller gave me a discount. She's so nice!

I also bought a set of acrylic paint at the school supplies section of SM Department Store. Couldn't find a set in National Bookstore. This is an ordinary set of acrylic paint. Ones used for painting. As you can see, they're only 239.75 pesos!

I was contemplating on buying acrylic paint intended for nails but I'm afraid I wouldn't put it in a good use. I'm not good in drawing tiny details or painting stuff either. Just really wanted to try out acrylics. Acrylic nail paint is a bit pricey for a student like me! Plus, I've read in some blogs that ones sold in the mall works just great. 

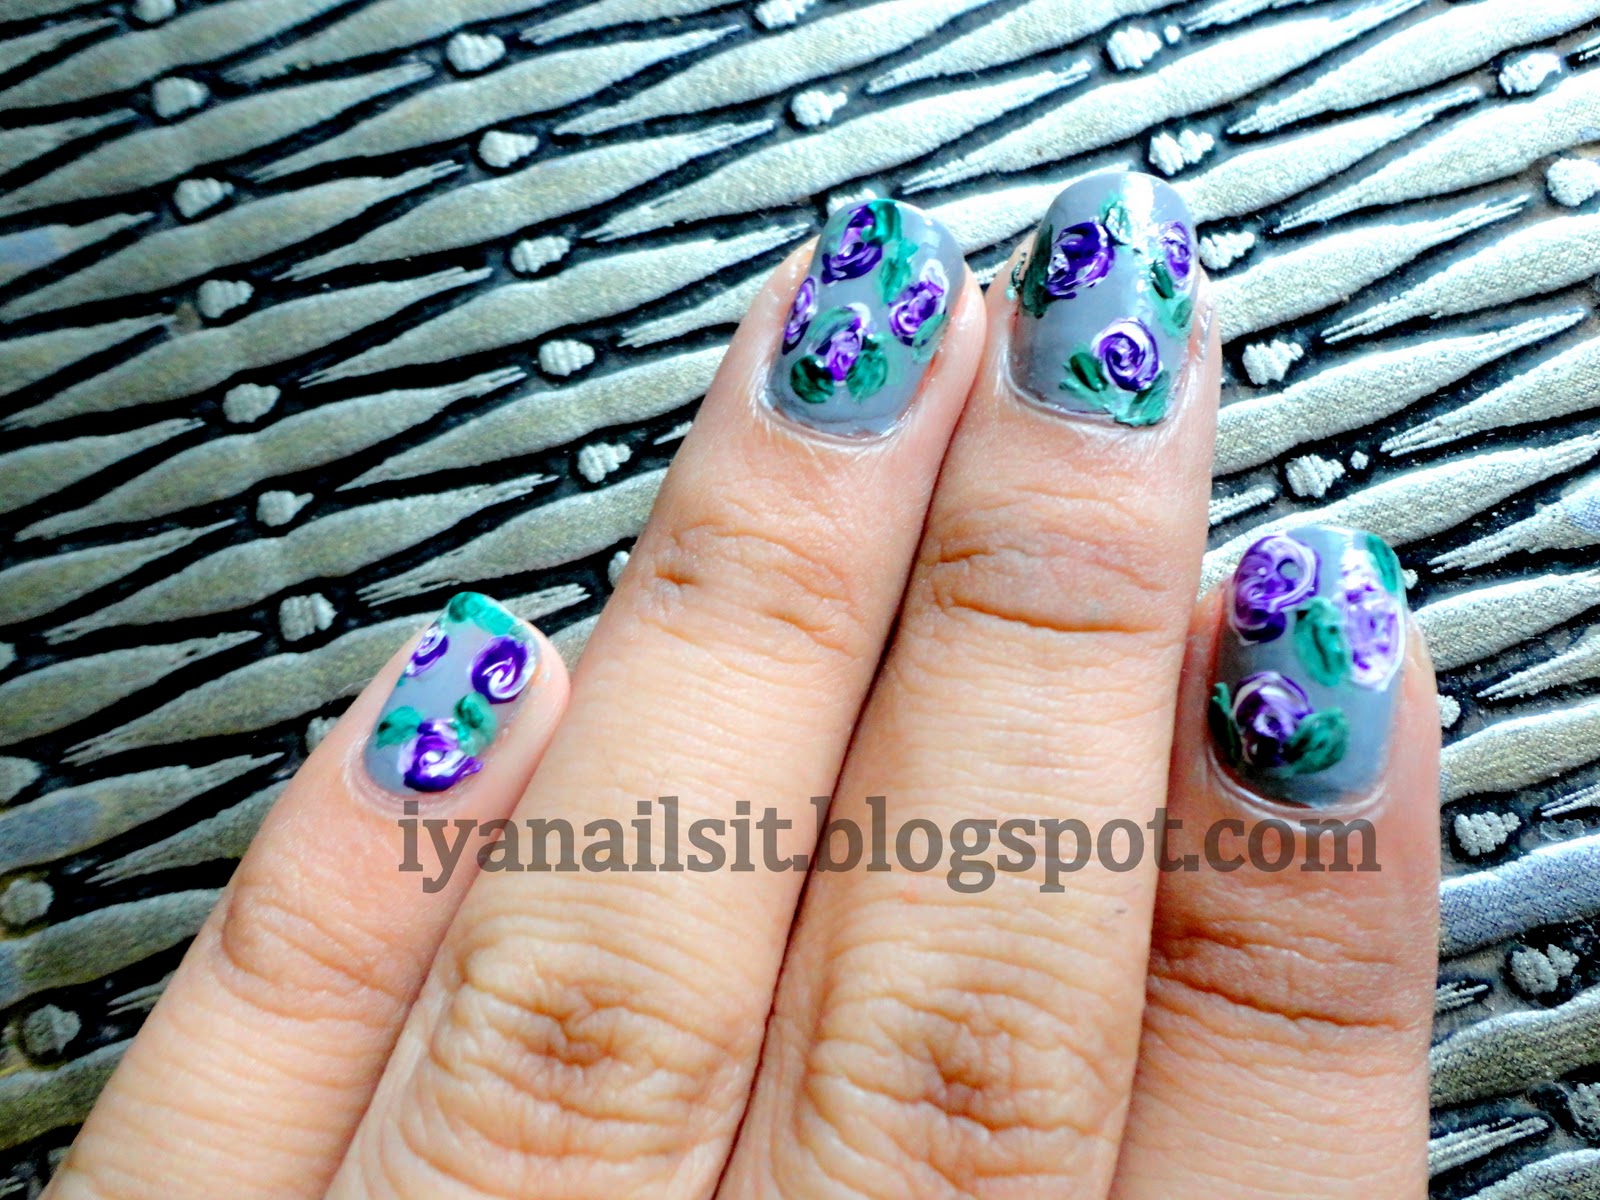
And so I bought and tried them on. The first picture is my first attempt on using these paint. I followed this tutorial on Youtube on how to make roses using acrylic paint. Pretty simple!

I used white and purple in creating the roses. Another amazing thing about acrylics is they can be mixed easily to get the shade of color that you want.


I enjoyed using acrylic paint on my nails! I will learn more techniques soon!

Saturday, October 15, 2011

Flowers and an owl

Happy weekend everyone! Before I leave the house for worship practice, I'd show you a mani where I used paper hole reinforcements. Paper hole reinforcements are used to make half moons. A nail tip guide can be a good alternative too! The cuticle area of your nail is covered to achieve a half moon mani.


This is how hole reinforcements look like. 
I bought mine from National Bookstore for 15 pesos, I think.


Johanne advised me that they are available in NBS, thank you sis! You are so helpful :) 


I used the following polishes for this mani: 

 I was really into Nail Nerd's designs lately. One of her designs served as my inspiration.

Paper reinforecements are big help!
 I used a detail brush in drawing those leaves. This is a freebie given by Johanne for my purchase of a 12pc brush set. I'll post about it too! She also gave me nail tip guides. Thanks again! :) 

These are the brushes I bought from Johanne. Check out her shop at Facebook, Fab UR Nails Shop. 
This would be all for now. Stay posted as I post the pictures of my brushes! 


Monday, October 10, 2011

Green stained glass + tutorial

As I said in my previous post, here are the pictures of my green stained glass mani. :)


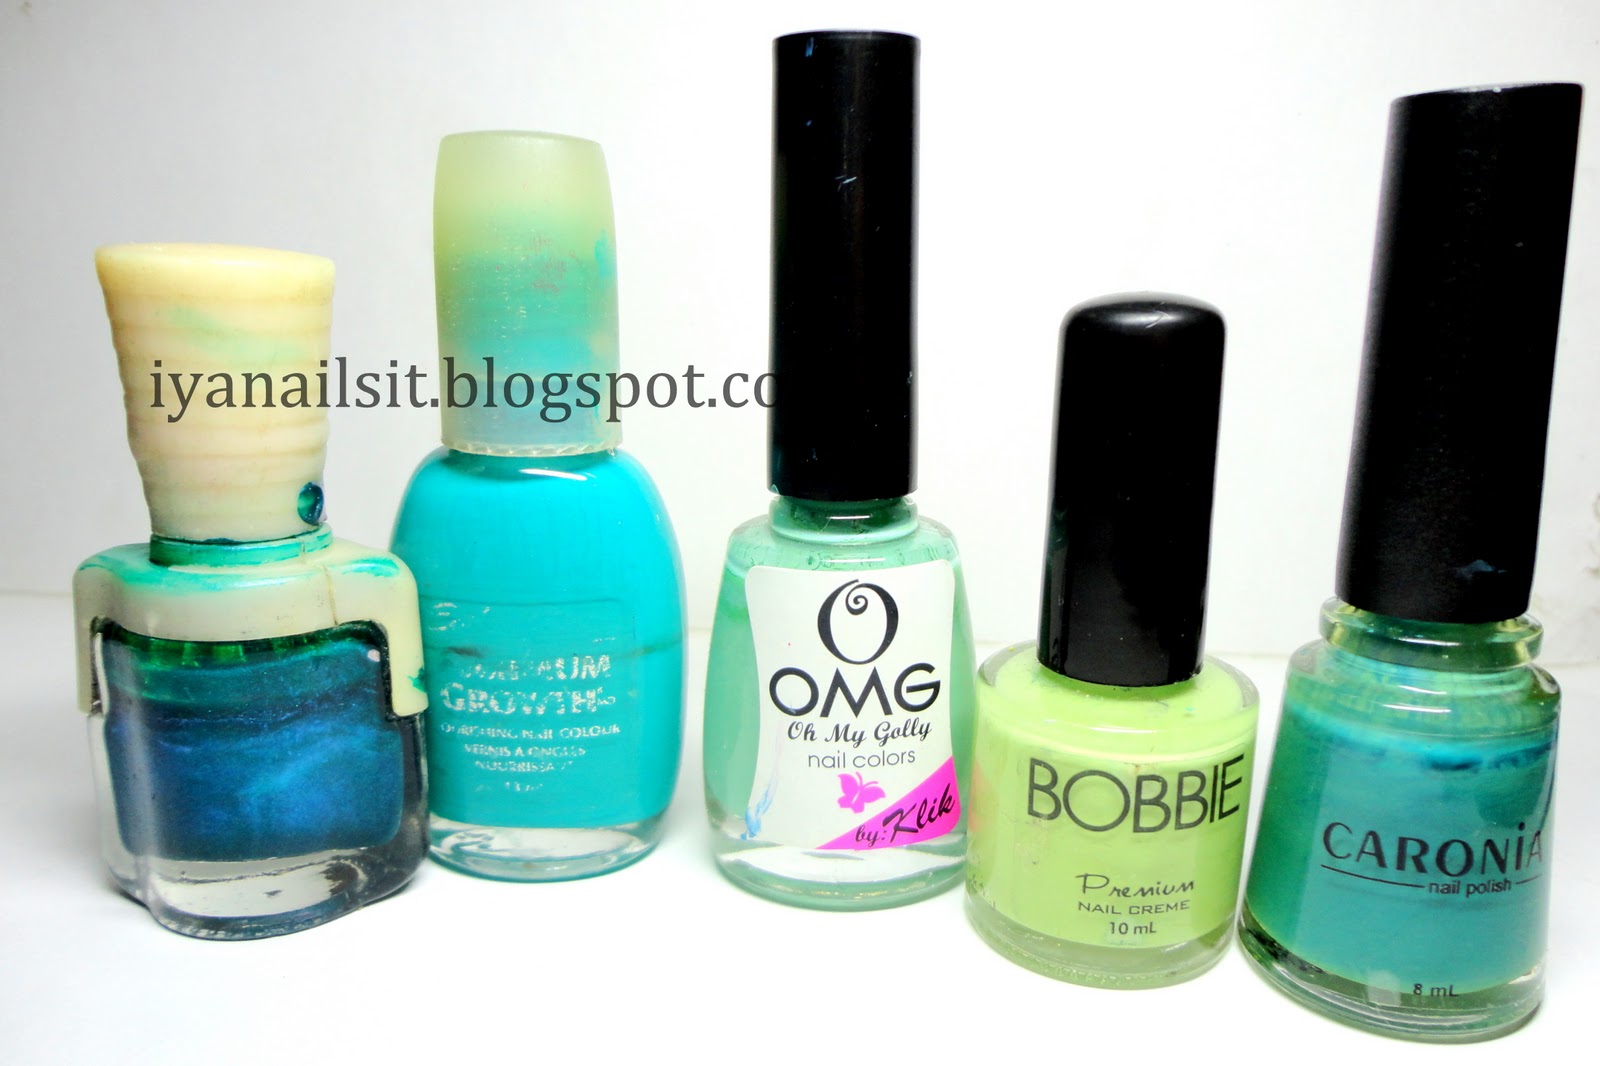
The polishes I used were these..My polish bottles look shabby. Haha! I used a two way nail art pen to create the outlines.

For those interested with how I did this mani, scroll further.
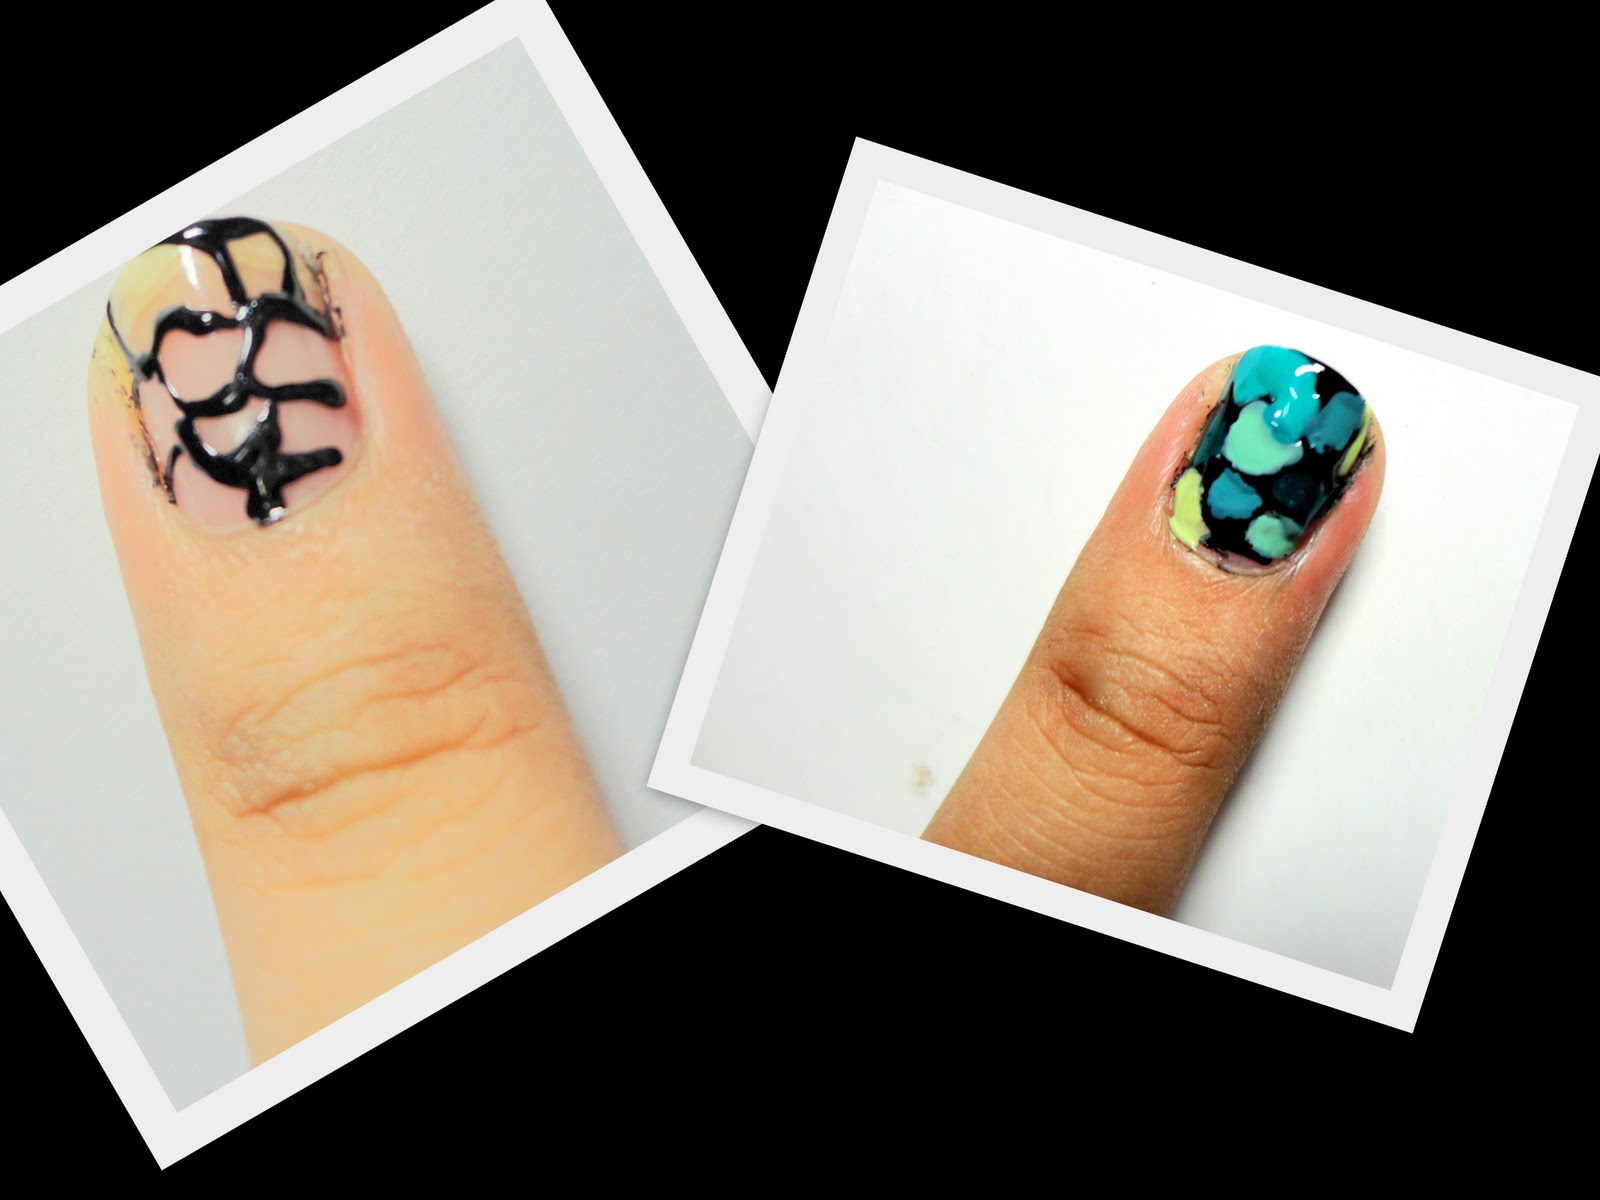
The picture on the left shows the initial step. Randomly make irregular and connecting shapes on your nails. You don't need perfect lines here! Have fun and be creative!

And then, fill in the empty spaces with your set of polishes. No rules in here too! Just go random.

Finally, redo the lines with your two-way nail art pen. A tiny brush would do too. Your end result would probably look like this

Good night guys!

Stained glass

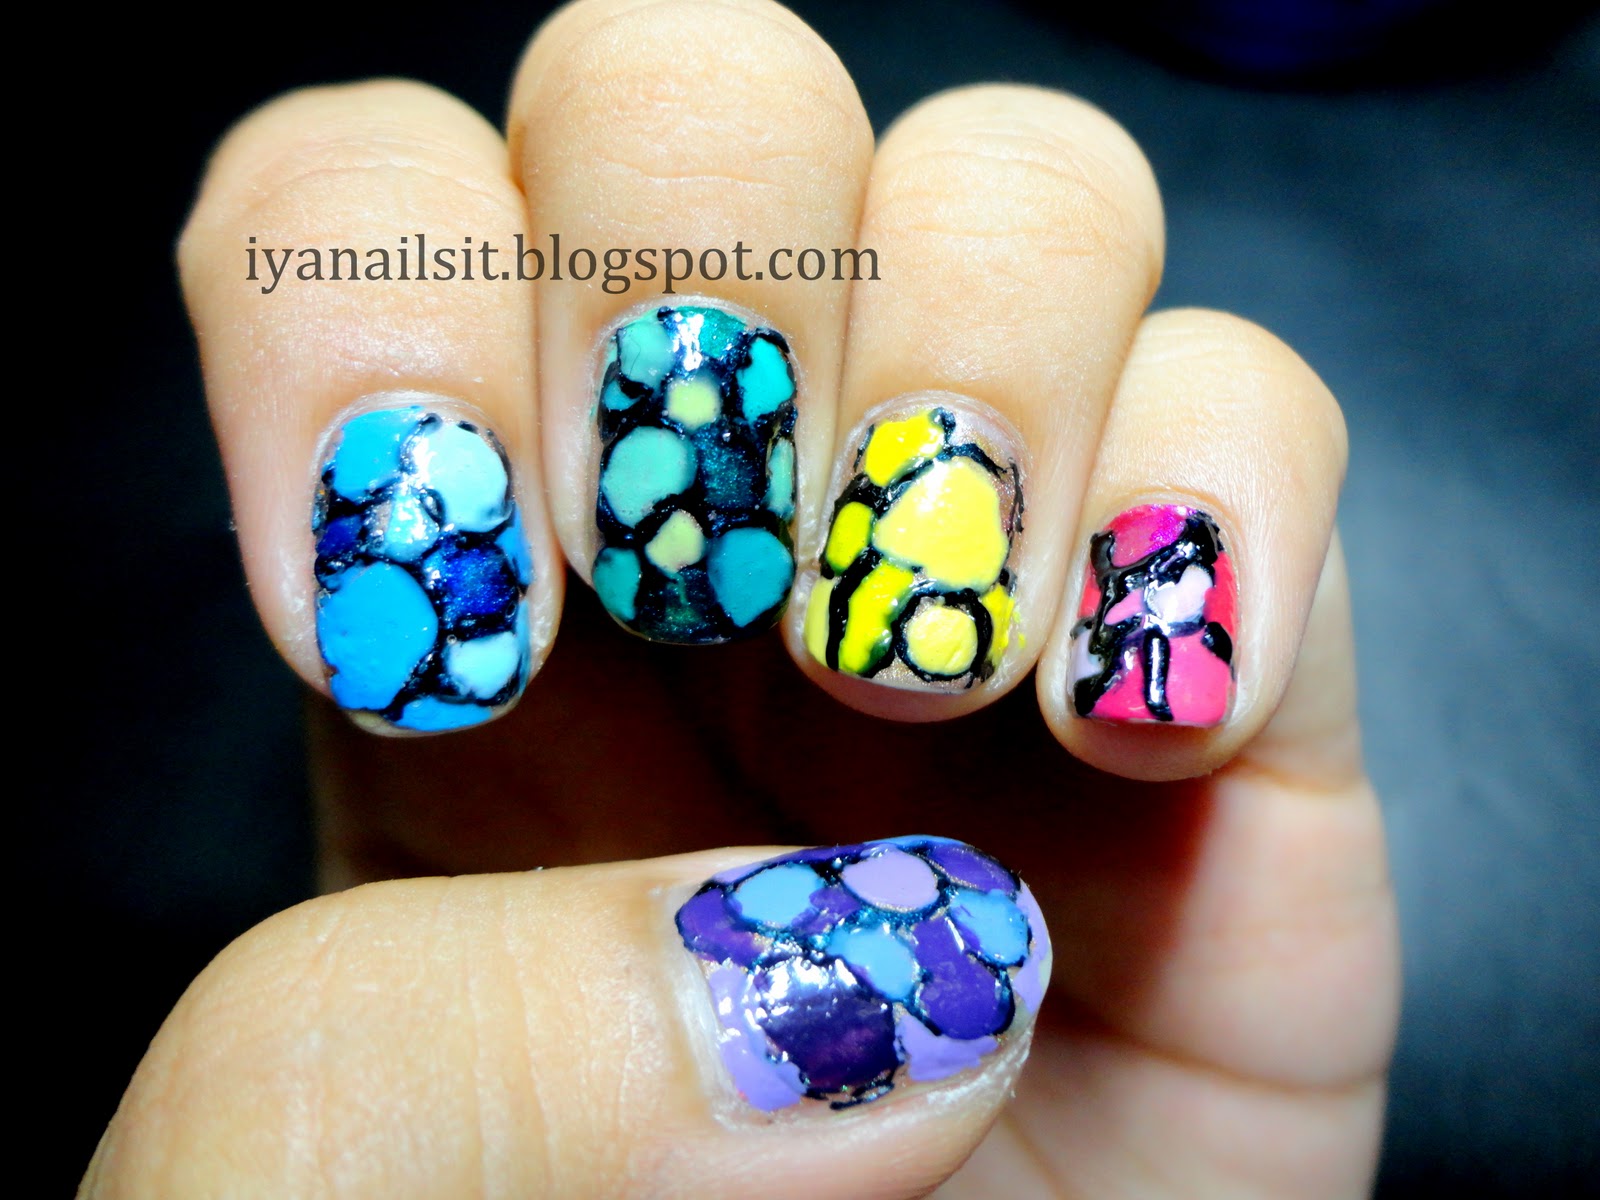
Good evening guys! I'd like to show you my stained glass mani. It was really supposed to be circles, I wanted to do Nailnerd's blue balls but then I got a little playful with the black outlines and so the end result. My two-way nail art pen is also to blame as it spurts out polish all of a sudden. I badly want a new one!

My pinky nails got the thickest outlines! However, I'm still happy with the end result. It looks nice from afar. Looks really wonky up close. So please, don't zoom :)

I tried it in 5 different colors - Purple, Blue, Green, Yellow and Pink so I can have different options. After a while, I decided for the green group to stay.


I will post the full nails with green stained glass design right after I publish this. Keep posted!

Sunday, October 9, 2011

What I did during the brownout. . .

As many of you may know, the typhoon Pedring caused brownouts over many cities in the Philippines. It was frustrating as I cannot do anything - no TV, no internet. But I gotta be thankful because we weren't affected by floods. Ondoy was enough for us.

To pass off time, I decided to do a rainbow mani. Very timely. As the song goes, "...there's a rainbow always after the rain." I love the rainbow! Here it is,


I know the lines were uneven. It was hard doing this kind of mani with no sufficient light! Pictures were taken under artificial light, after the brownout of course. I altered the colors on some fingers. Only the thumb and the ring finger got the full rainbow colors. I thought it would look too much to put all the rainbow in every nail.


To finish off the look, I drew a black umbrella on my thumb.

Hope you had a great weekend! Goodnight! 

LinkWithin

Related Posts Plugin for WordPress, Blogger...